Docs for version 2.0
Docs
Build assisted-install FileMaker Pro installers for your organization or for each of your customers, with the app or with fmig, its command-line tool, on a build server.
Install the app
- macOS: open the .dmg and drag FileMaker Installer Generator to Applications. Apple silicon and Intel.
- Windows: run the setup .exe. It installs for you only, without administrator rights.
- Updates are offered inside the app (Settings → General).
What you need
- Your Claris license: the Electronic Software Download page address from your licensing email, or the installers and the .fmcert certificate.
- A Mac to build macOS packages. Windows installers build on a Mac or a PC.
- For Windows installers: 7-Zip and its SFX module (Settings → Tools → Download).
- To sign: a Developer ID Installer certificate for macOS (and an Apple account to notarize), and Azure Artifact Signing or a certificate file for Windows.
License and Installers
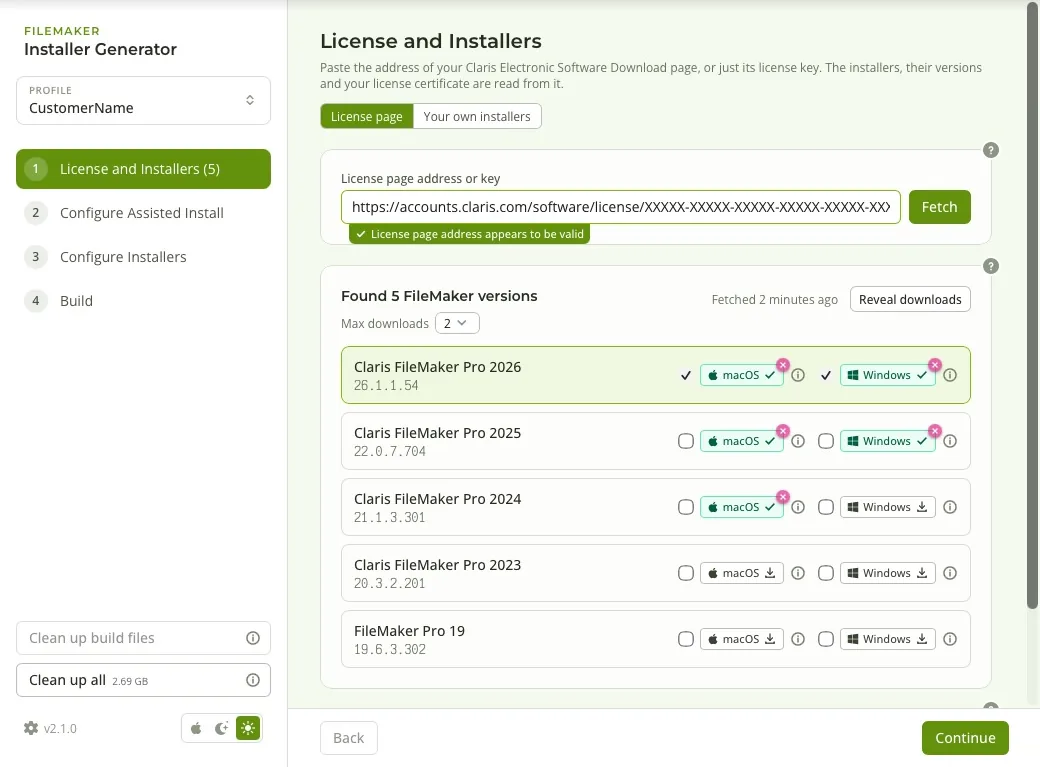
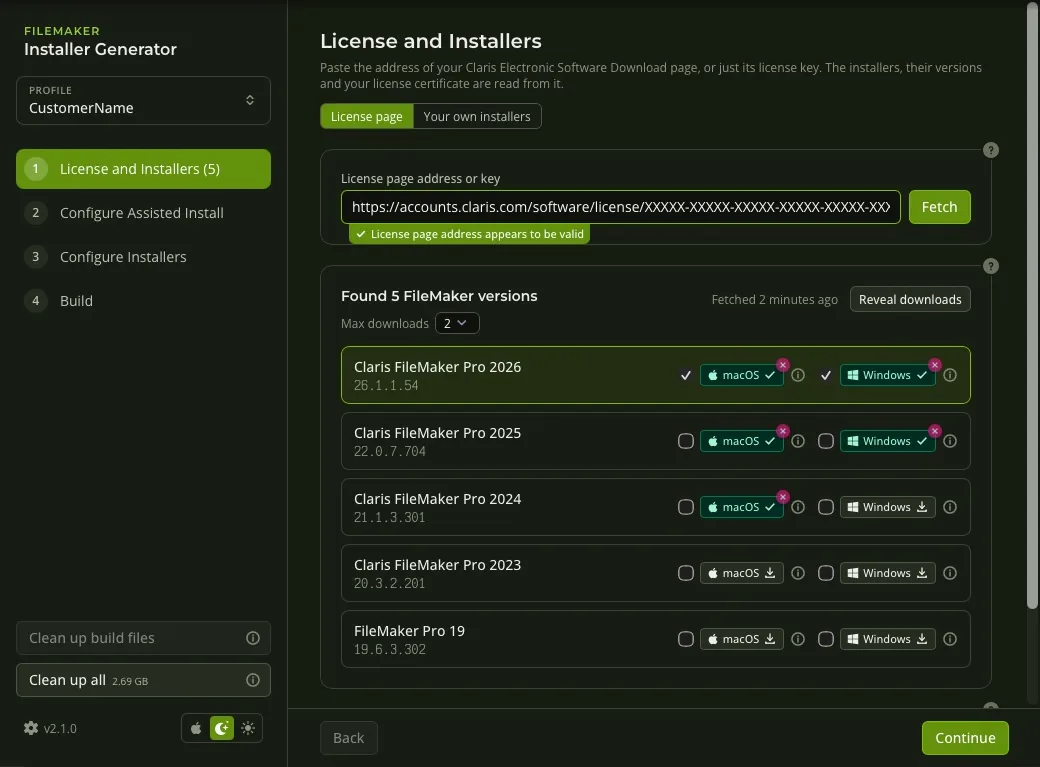
Paste your license page address and click Fetch. The app lists every FileMaker version your license covers and downloads the license certificate. Tick the installers to build for each version; download them ahead of time, or let the build do it. The info icon beside each platform shows the operating systems Claris supports for that version.
No license page? Choose Your own installers, add .dmg and .exe files (or drop them on the window), and choose your .fmcert. Versions are read from the files.
Configure Assisted Install
The installation settings that go into every installer: user name, organization, update and announcement prompts, shortcuts, plug-ins and more. Each has help in plain words; Default puts it back to FileMaker's own value.
Configure Installers
- The output folder for finished installers.
- macOS package: identifier and build number; sign with a signing profile, and notarize.
- Windows installer: title, prompt, install folder, installer UI and compression; sign with a signing profile.
Build
Check the list and click Build. The log opens full size with progress for each installer, and is saved with the profile. Finished installers appear under Built installers with Reveal, Log and Trash. If notarization fails, the app asks whether to keep the signed package.
Platforms and signing has the switches for this build: each platform, Sign and Notarize, and Check OS version and Install prerequisites.
OS check and prerequisites
FileMaker's own installers don't stop on an operating system that is too old: the Mac app copies fine and then won't open, and the Windows installer runs on anything from Windows 7. Two options on Build fix that, and a third takes care of what FileMaker Pro needs on Windows.
Check OS version
On for a platform, the built installer refuses, before anything is installed, to run on an operating system older than Claris supports for that FileMaker version. It checks the oldest version Claris lists; newer ones are always allowed.
- macOS: Apple's Installer says the version can't be installed on this computer, which macOS it requires and which one the Mac has. With
installeror an MDM, the install fails with the same sentence. - Windows: a dialog says the same and the installer ends. Installed silently (the
/qninterface), it shows nothing and ends with exit code 1150.
Each installer in the Build list says what it will require, for example Requires macOS 26 or later, or warns No OS check when the option is off or Claris lists nothing for that version. Build also warns when the computer you are on is older than an installer you are building for it: it can be built there, but not installed there.
Install prerequisites (Windows)
Before FileMaker Pro, the installer adds what is missing of the Visual C++ runtime, the Edge WebView2 runtime, .NET Framework and Bonjour, from the Claris package itself. What is already there is left alone. Turn it off if you deploy these yourself.
On Windows, each run is recorded in %TEMP%\fmig-setup.log: the Windows build it found, what it installed, and how the FileMaker installer ended.
Where the requirements come from
From Claris's operating system requirements page. The info icon beside each platform on License and Installers shows them for that version. The app reads the page again by itself when it reads your license page or you add an installer: the first time, when a FileMaker version is not in its list, and every 30 days. Update Now in Settings → General does it on request.
New and existing profiles
The three options are saved with each installer profile. New profiles start with them on (change that in Settings → General → Defaults for New Profiles). Profiles made before these options existed keep building as they did until you tick the boxes on Build.
Installer profiles
Separate setups for each customer, department or license. Consultants usually keep one profile per customer (CustomerName, say); in-house, one per license or group of machines is typical. Manage them from the menu at the top of the sidebar: New, Duplicate, Rename, Use as Default and Remove. Each profile has its own license page, settings, built installers and logs; downloaded installers are shared. File → Export for fmig… writes a profile as a config file.
Settings and signing
- General: update checks and installs, colour scheme, the defaults for new profiles (OS check, prerequisites) and the requirements list's date with Update Now.
- macOS Signing and Windows Signing: signing profiles, shared by all installer profiles. Passwords stay in the Keychain or Credential Manager. See Signing setup.
- Tools: 7-Zip and the SFX module, and the fmig command-line tool.
Install fmig
- macOS: Settings → Tools → Command-line tool → Install… It links
/usr/local/bin/fmigto the copy inside the app, so app updates update it too. - Windows: the installer adds fmig to your PATH.
fmig path removeor Settings → Tools takes it off;setup.exe /NOFMIGPATHskips it for silent deployments.
Without the app
Each release also has fmig on its own, for build servers and computers without the app. These commands install the newest one; run them again to update.
macOS (Apple silicon and Intel; signed and notarized), in Terminal:
sudo mkdir -p /usr/local/bin
curl -fsSL https://git.intergrated.net/the-perfumery/filemaker-installer-generator/-/releases/permalink/latest/downloads/fmig-macos-universal.tar.gz | sudo tar -xz -C /usr/local/bin fmig
fmig --help
Windows (x64; signed), in PowerShell. No administrator rights are needed; open a new terminal afterwards:
$dir = "$env:LOCALAPPDATA\Programs\fmig"
New-Item -ItemType Directory -Force $dir | Out-Null
curl.exe -fsSL -o "$dir\fmig.exe" https://git.intergrated.net/the-perfumery/filemaker-installer-generator/-/releases/permalink/latest/downloads/fmig-windows-x64.exe
& "$dir\fmig.exe" path add
To remove it, delete the file (on Windows, run fmig path remove first).
Quick start
# Your profiles, the default marked
fmig profiles

# What would be built, without building
fmig build --profile CustomerName --dry-run

# Build the macOS package, signed and notarized
fmig build --profile CustomerName --platforms mac --notarize
Commands
fmig build | Build installers from a profile or a config file |
|---|---|
fmig profiles | List the profiles set up in the app |
fmig export <profile> | Write a profile as a config file (no secrets; the license address only with --include-license) |
fmig init | Make a config file by answering a few questions |
fmig config validate | Check a config file without building |
fmig path add | remove | Windows: put fmig on your PATH, or take it off |
Config files
Set up a profile in the app, then export it with File → Export for fmig… (⇧⌘E), Export for fmig… on the Build step, or fmig export <profile> -o. The suggested name is <profile>-ci.config.json. Commit the file; secrets stay out of it.
{
  "schema": 1,
  "versions": ["latest"],
  "platforms": ["mac", "windows"],
  "assisted": { "AI_ORGANIZATION": "CustomerName", "AI_SKIPDIALOG": "1" },
  "mac": {
    "os_check": true,
    "sign": { "identity": "Developer ID Installer: Your Company (TEAMID1234)" },
    "notarize": { "keychain_profile": "notary" }
  },
  "windows": {
    "os_check": true,
    "install_prerequisites": true,
    "sign": { "method": "azure", "azure": { "endpoint": "…", "account": "…", "profile": "…" } }
  }
}
os_check and install_prerequisites are the OS check and prerequisites options. An export always writes them. Left out of a file built without a profile, they are off; --os-check (optionally with mac or windows) and --prerequisites turn them on from the command line. fmig build --dry-run shows what each installer will require.
fmig can't read Claris's requirements page itself. It uses the list the app last read on that computer, or the one that came with fmig, so on a build server the list is as new as the fmig installed there.
Environment variables
Every option can also be set with an environment variable: --output-dir is FMIG_OUTPUT_DIR, --notarize is FMIG_NOTARIZE=1. The command line wins over the environment, the environment over the config file.
| Variable | What |
|---|---|
FMIG_LICENSE | Your Claris license page address, or just the key |
FMIG_LICENSE_CERT | A .fmcert file, so the runner needn't fetch it |
FMIG_VERSIONS | latest, all, or versions like 26.1.1,22.0.4 |
FMIG_OS_CHECK | 1, or mac / windows: installers refuse an operating system that is too old |
FMIG_PREREQUISITES | 1: Windows installers add missing prerequisites first |
FMIG_AZURE_CLIENT_SECRET | Azure service principal secret (or AZURE_CLIENT_SECRET) |
FMIG_APPLE_APP_PASSWORD | Apple app-specific password, for notarizing with an Apple ID |
fmig init
No app on hand? fmig init asks the questions instead, checks the answers, and saves ./ci.config.json.
$ fmig init
? Platforms  macOS, Windows
? Versions  Newest
? Sign the macOS package with  Developer ID Installer: …
? Customize Assisted Install?  Yes
…
? Save to  ./ci.config.json
Saved. On the build server, set FMIG_LICENSE and FMIG_AZURE_CLIENT_SECRET.
CI CONTINUOUS INTEGRATION
Commit a config file, keep the license and signing secrets in your CI's masked variables, and build fresh installers on a schedule or whenever the config changes. macOS packages need a macOS runner with fmig on its PATH (from the app, or fmig on its own from the release); Windows-only builds can use fmig.exe from the release on any Windows runner.
GitLab CI
build-installers:
  tags: [macos]
  variables:
    FMIG_VERSIONS: latest
  script:
    - fmig build --config ci.config.json --output-dir installers
  artifacts:
    paths: [installers/]
# FMIG_LICENSE and the signing secrets: masked CI/CD variables
Several customers? Keep one config per customer (customers/CustomerName-ci.config.json) with its license in its own masked variable, and add a job for each.
GitHub Actions
name: Build installers
on:
  push:
    paths: [ci.config.json]
  workflow_dispatch:

jobs:
  build:
    runs-on: [self-hosted, macOS]
    env:
      FMIG_LICENSE: ${{ secrets.FMIG_LICENSE }}
      FMIG_AZURE_CLIENT_SECRET: ${{ secrets.FMIG_AZURE_CLIENT_SECRET }}
      FMIG_VERSIONS: latest
    steps:
      - uses: actions/checkout@v4
      - run: fmig build --config ci.config.json --output-dir installers
      - uses: actions/upload-artifact@v4
        with:
          name: installers
          path: installers/
Add the secrets under Settings → Secrets and variables → Actions. For several customers, use a matrix over customers/*-ci.config.json.
Signing setup
Signing is optional, but unsigned installers get security warnings (Gatekeeper, SmartScreen) and some deployment tools refuse them. These are one-time setups; afterwards the details live in a signing profile (Settings → macOS Signing, Settings → Windows Signing) or in a config file.
macOS: Developer ID and notarization
macOS only. Signing and notarizing the .pkg needs a Mac (or a macOS build server) with the Xcode Command Line Tools: xcode-select --install.
Get the certificate
- Join the Apple Developer Program (a paid yearly membership). In an organization, only the Account Holder can create Developer ID certificates.
- Create a Developer ID Installer certificate: in Xcode, Settings → Accounts → Manage Certificates → +. Or request one in Keychain Access (Certificate Assistant) and upload the request at developer.apple.com → Certificates.
- Do this on the Mac that builds: the private key stays in its keychain. For another Mac or a build server, export the certificate with its key from Keychain Access as a password-protected .p12.
- Check that it is there:
security find-identity -v -p basic | grep "Developer ID Installer"
It must be Developer ID Installer: Developer ID Application signs apps, not packages.
Set up signing
- In Settings → macOS Signing, add a signing profile and choose the certificate from the keychain, or a certificate file (.p12, or PEM certificate and key) with its password.
- On Configure Installers, tick Signed for macOS and choose the profile. The first build asks whether
pkgbuildmay use the key: choose Always Allow.
Set up notarization
- Find your Team ID at developer.apple.com/account under Membership details.
- Create an app-specific password at account.apple.com → Sign-In and Security → App-Specific Passwords (not your normal Apple ID password).
- Store both once as a notarytool keychain profile, pasting the password when asked:
xcrun notarytool store-credentials "notary" \
  --apple-id "you@example.com" \
  --team-id "TEAMID1234"
- In the signing profile, tick Notarize with Apple, choose Keychain profile and enter
notary. Test credentials checks it.
On a build server without a keychain profile, a config file can notarize with an App Store Connect API key instead (key_path, key_id, issuer_id), or an Apple ID with FMIG_APPLE_APP_PASSWORD.
Windows: Azure Artifact Signing
Microsoft's cloud signing service (formerly Trusted Signing). The certificate never leaves Azure, and it works from macOS as well as Windows.
In Azure
- In the Azure portal, create an Artifact Signing account. Note its region: it decides the endpoint, for example
https://eus.codesigning.azure.netfor East US. - Complete Identity validation for your organization. Microsoft verifies it before issuing certificates, which can take some days.
- Create a Certificate profile (Public Trust) with the validated identity, and note its name.
A sign-in for the app or build server (service principal)
- In the Microsoft Entra admin center, go to App registrations → New registration.
- From its Overview page, copy the Directory (tenant) ID and Application (client) ID.
- Under Certificates & secrets, create a Client secret and copy its Value straight away (not the Secret ID): Azure shows it once. Secrets expire, at most after two years.
- Give it the signer role: in the signing account (or one certificate profile), Access control (IAM) → Add role assignment → Artifact Signing Certificate Profile Signer → select the app registration. It can take a few minutes to apply.
On your own computer the Azure CLI works too: run az login and give your own account the signer role.
In the app
- In Settings → Windows Signing, add a profile with Azure Artifact Signing: the endpoint, signing account and certificate profile.
- Choose Service principal, enter the tenant ID, client ID and client secret, and use Test sign-in.
Sign-in works but signing answers 403? The signer role is missing, was given to another app, hasn't applied yet, or the endpoint's region doesn't match the account.
Variables for GitLab and GitHub
An exported config file holds everything except secrets. Those come from your CI's variables; fmig export and fmig config validate list the ones your config needs.
| Variable | Needed when |
|---|---|
FMIG_LICENSE | Always, unless the license address is in the config |
FMIG_AZURE_CLIENT_SECRET | Windows, signed with Azure and a service principal |
FMIG_WINDOWS_CERT_PASSWORD | Windows, signed with a certificate file |
FMIG_MAC_CERT_PASSWORD | macOS, signed with a certificate file (.p12) |
FMIG_APPLE_APP_PASSWORD | macOS, notarized with an Apple ID |
Not secrets, so they stay in the config: the signing identity, the Azure endpoint, account, profile, tenant ID and client ID, and the notarytool profile's name. A keychain identity and a notarytool profile must already be on the macOS build server.
GitLab
- Go to Settings → CI/CD → Variables in the project, or in the group to share them between projects.
- Add each variable with Masked on, so it never shows in job logs, and Protected if only protected branches and tags should build.
- For a certificate or key file (.p12, .p8, .fmcert), add a variable of type File: the job gets the path of a temporary file. Copy it to the path your config names.
build-installers:
  tags: [macos]
  script:
    - cp "$MAC_CERT_P12" certs/installer.p12   # a File variable
    - fmig build --config ci.config.json --output-dir installers
# FMIG_LICENSE, FMIG_MAC_CERT_PASSWORD and FMIG_AZURE_CLIENT_SECRET
# are masked variables: fmig reads them from the environment
GitHub
- Go to Settings → Secrets and variables → Actions and add each one under Secrets (repository, or organization to share them).
- Secrets aren't passed to jobs automatically: map each one in the workflow's
env. - GitHub has no file secrets. Store a certificate or key as base64 (
base64 -i installer.p12 | pbcopy) and decode it in a step.
    env:
      FMIG_LICENSE: ${{ secrets.FMIG_LICENSE }}
      FMIG_MAC_CERT_PASSWORD: ${{ secrets.FMIG_MAC_CERT_PASSWORD }}
      FMIG_AZURE_CLIENT_SECRET: ${{ secrets.FMIG_AZURE_CLIENT_SECRET }}
    steps:
      - uses: actions/checkout@v4
      - run: echo "$MAC_CERT_P12_BASE64" | base64 --decode > certs/installer.p12
        env:
          MAC_CERT_P12_BASE64: ${{ secrets.MAC_CERT_P12_BASE64 }}
      - run: fmig build --config ci.config.json --output-dir installers
Secrets are hidden from logs on both, but anything a script prints or writes to an artifact is not: keep certificate files out of the repository and out of job artifacts.